
Update 3/26: Adding a guide for opening/connecting to VM using Stream Deck.
Shortcut for Windows 11
Ever want to launch a VM directly without opening the main Hyper-V app first? Follow this steps to create a Virtual Machine connection shortcut.
- In your selected directory, right-click on an empty space to open the context menu. Within New, select Shortcut.
Create New Shortcut
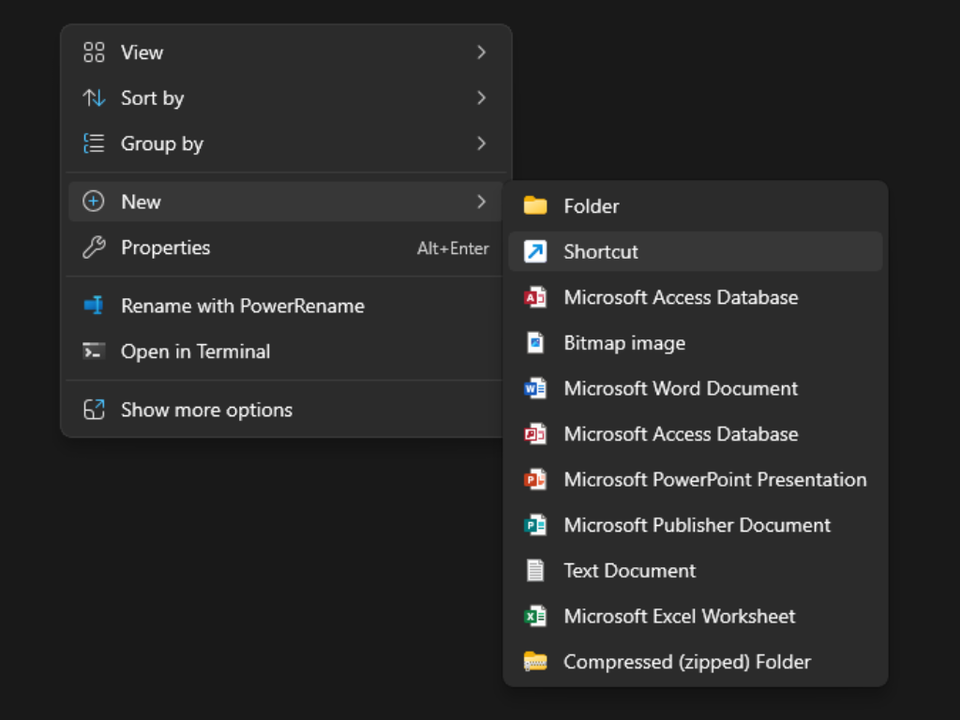
- In the Create Shortcut window, enter the target settings shown below:
|
|
Shortcut Target Settings
where <Hyper-V Server IP Address> is the host IP address of the Hyper-V server. And “<Name of VM>” is the actual VM name as seen in Hyper-V window.
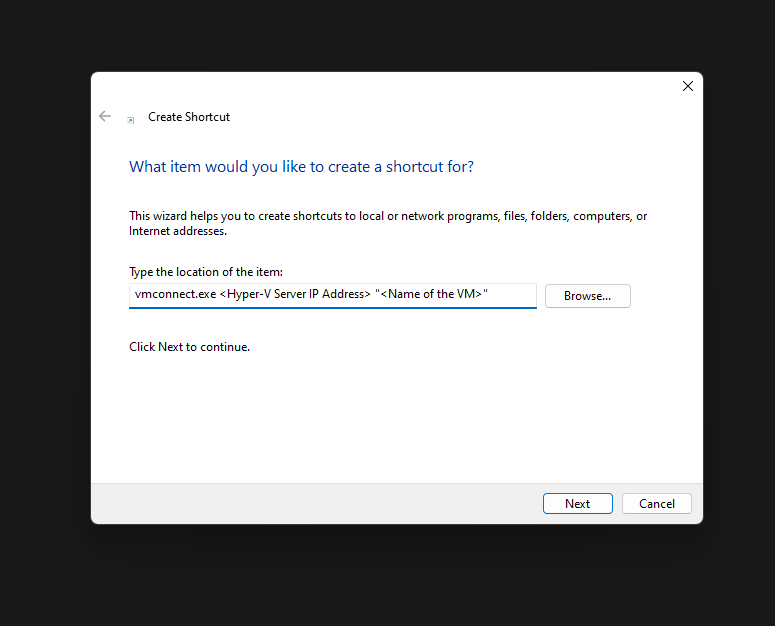
- Click Next, and give your shortcut a name:
Giving the shortcut a name
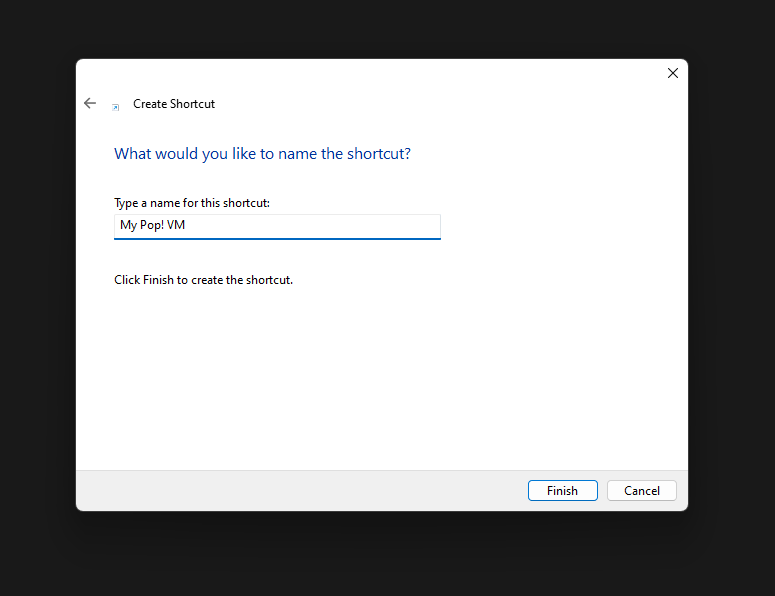
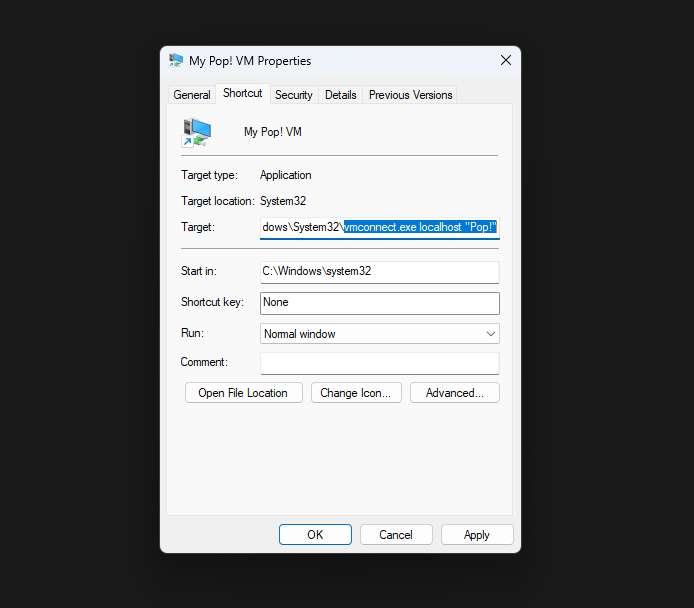
Below is an example of a shortcut for my Pop!_OS VM in my local machine (Shortcut Properties), where Pop! is the name of my Virtual Machine.
Sample of my VM
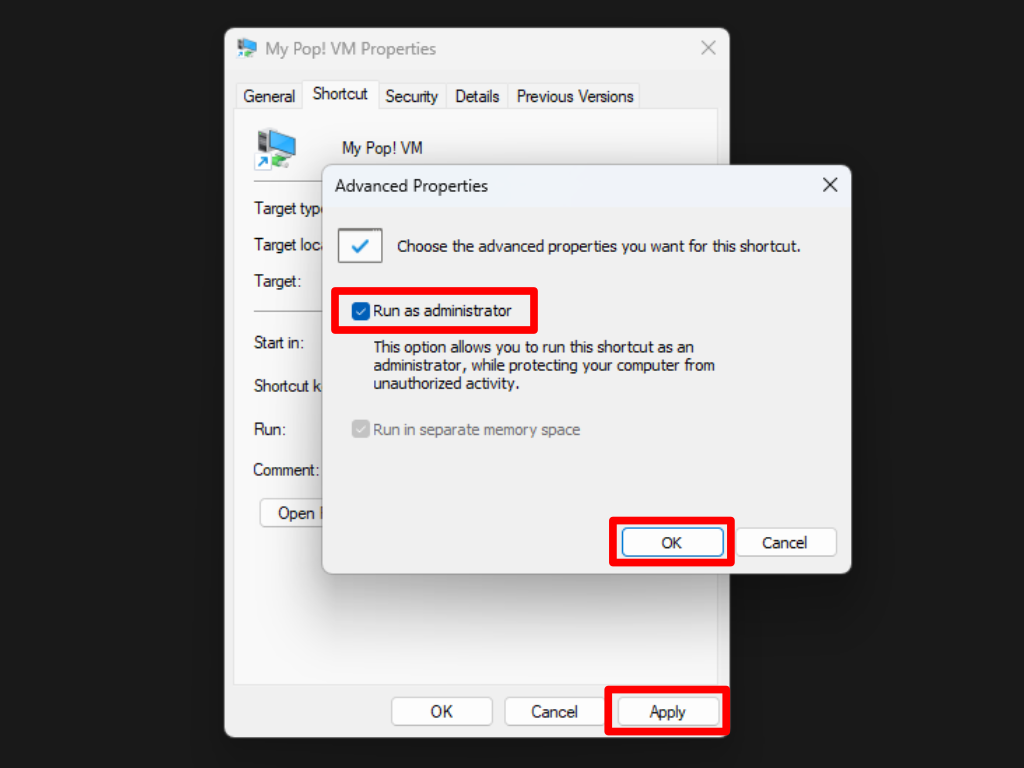
- Before opening the shortcut though, we need to make it to Run as administrator. Instead of right-clicking and manually running as admin each time, let’s change the shortcut’s Advanced properties:
Changing Advanced properties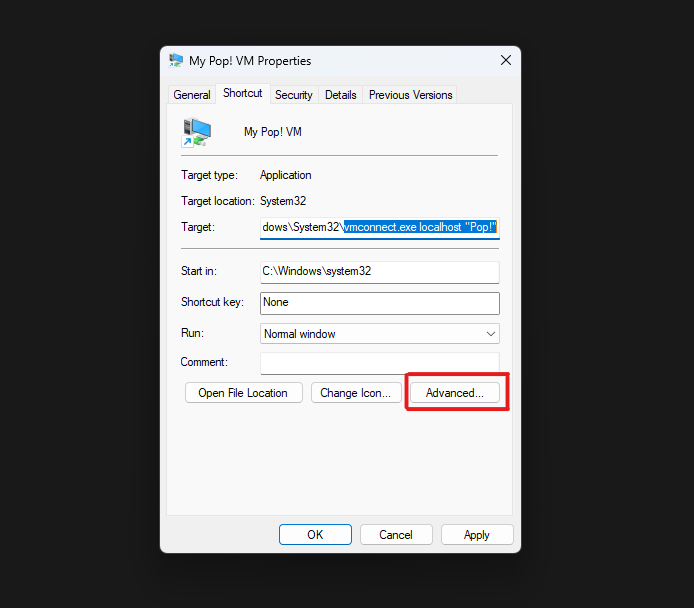
And that’s it for your shortcut to run your VM.
You can change the shortcut icon and/or you can move or copy the shortcut to show in your Start Menu (either one of the paths below).
|
|
Using Stream Deck to open VM Connection
The shortcut created above can be used as the App/File for the Open function of the bundled System plugin for StreamDeck. As seen below:
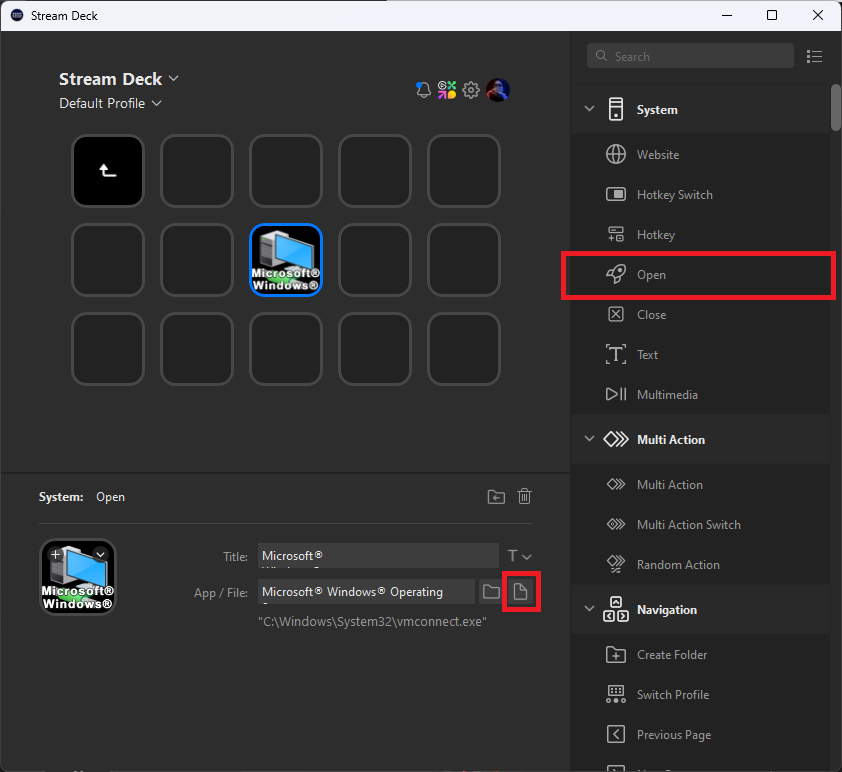
VM Shortcut in Stream Deck
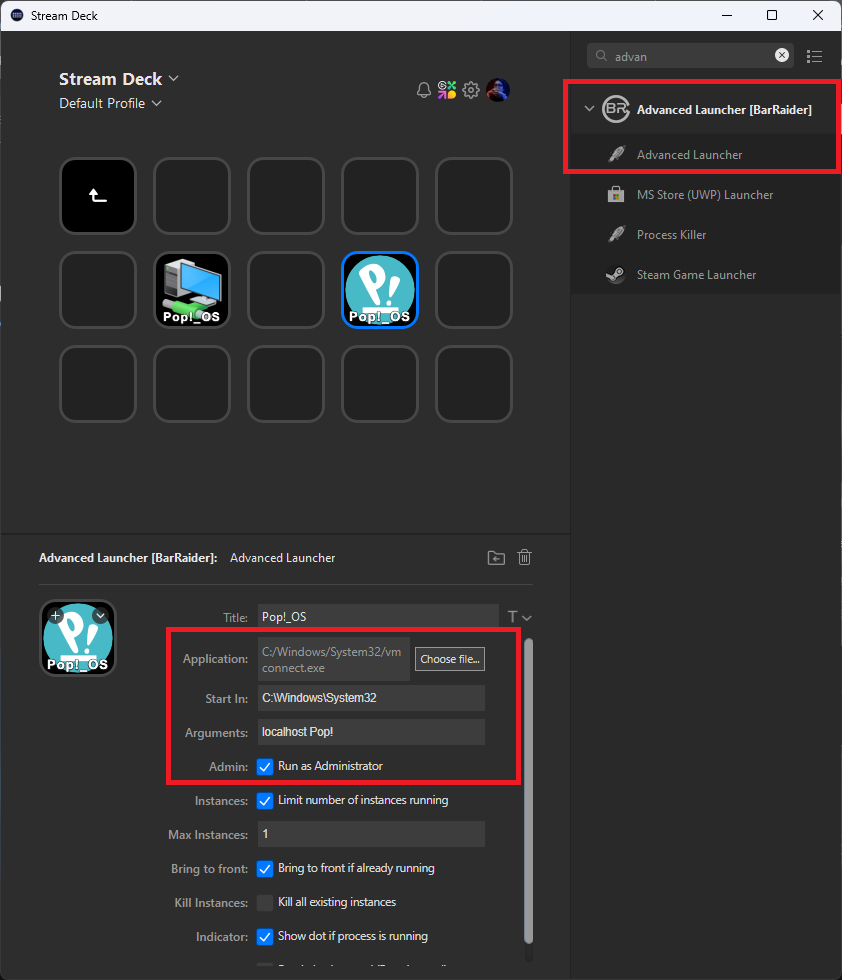
Using BarRaider’s Advanced Launcher
This requires installing the above-mentioned plugin, found here: Marketplace or Old Plugins Page (note: both are version 1.8 as of this writing).
Once installed, add an Advanced Launcher button into your Stream Deck and do the following:
- Customize your button icon and give your button a Title. Or not.
- In Application > Choose file…*, you need to navigate to
C:/Windows/System32/and choosevmconnect.exe - In Arguments, type in
<Hyper-V Server IP Address> "<Name of VM>",
where<Hyper-V Server IP Address>is the host IP address of the Hyper-V server. And"<Name of VM>"is the actual VM name as seen in your Hyper-V server.
(Note: Stream Deck might remove the double-quotes in cases where the VM name has no spaces) - Check the Run as Administrator checkbox.
In my case, as seen below, I customized my button properties further:
- Instances: Checked
- Max Instances: 1 (since launching it will force disconnect previous instances)
- Bring to front: Checked (Stream Deck will try to make the VM window to front - or flash the taskbar icon)
VM launcher using Advanced Launcher
That’s it for adding a Stream Deck button to open your Virtual machine!